How to Scan Documents on Your iPhone: Quick and Simple Steps
Scanning documents is a good method of converting papers to soft copies using your iPhone. Of course, if you have to sign some contract, save receipts for the expenses, or keep a record on such pieces of paper, some options on your iPhone can help you with that. This guide will help you to learn how to scan a document on iPhone by utilizing the Notes app and the additional tips will help to optimize your work with Notes.
Understanding the Basics of Document Scanning on iPhone
Scanning means making a copy of the paper at a digital form. Your iPhone takes the picture, and then the scanning software translates the picture so as it is easy to read and understand. The Notes app that comes with your iPhone is one of the easiest ways by which you can scan documents.
Want to improve your iPhone security even further? Check out our expert guide how to block websites on iPhone to discover more ways to protect your device and enhance your browsing experience
Why Use Your iPhone for Scanning?
1. Convenience: Your iPhone is always with you, this means that any time you come across a document that you need to scan, you can easily do it.
2. Quality: The camera is not an issue in modern iPhones and is, therefore, highly likely to give professional scans.
3. Storage: They can be saved locally on your device or shared online and can be retrieved at a later time easily.
4. Editing Features: It also means that you can edit scans, add a signature, and work with your Notes in the Documents tool in the best way possible.
Make your iPhone upgrade seamless! Learn how to easily transfer all your data to your new device in just a few simple steps.
Step-by-Step Guide on how to Scan a Document on iPhone
Step 1: Open the Notes App
To start scanning, you first need to open the Notes app on your iPhone.
- Find the App: Look for the Notes app icon, which resembles a yellow notepad with a white background.
- Create a New Note: Tap on the icon to open the app. You can either select an existing note or create a new one by tapping the “New Note” icon (a square with a pencil).
Step 2: Access the Scanning Feature
Once you are in a note, follow these steps to access the scanning tool:
- Tap the Camera Icon: In the note, tap on the camera icon located at the bottom of the screen.
- Select “Scan Documents”: A menu will pop up. Choose “Scan Documents” to activate the scanning mode.
Step 3: Position Your Document
Now it’s time to scan your document:
- Place the Document: Lay your document flat on a well-lit surface. Make sure the entire document is visible to the camera.
- Auto Scan Mode: If your iPhone is in Auto mode, it will automatically detect the document and scan it. You will see a yellow box around the document when it is ready.
Step 4: Capture the Scan
You have two options for capturing the scan:
- Automatic Capture: If in Auto mode, the iPhone will scan the document automatically when it detects the edges.
- Manual Capture: If you prefer to do it manually, tap the shutter button or press one of the volume buttons to take the picture.
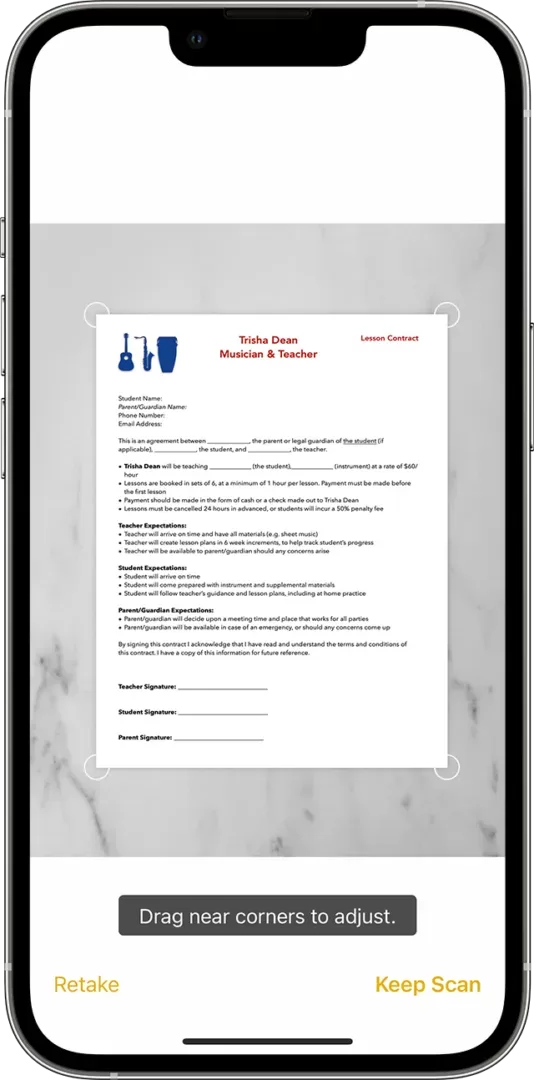
Step 5: Adjust the Scan
After capturing the scan, you can make adjustments:
- Drag the Corners: If needed, drag the corners of the scan to fit the edges of the document.
- Keep Scan: Once satisfied, tap “Keep Scan” to save it.
Step 6: Save the Document
You can add more scans to the same note or save your scan:
- Add More Scans: If you have additional pages, you can continue scanning.
- Save: When you are done, tap “Save” to keep your scanned document in the note.
Need help with your Apple Remote and soundbar connection? Read our guide why won’t my Apple remote work with my soundbar? to get your devices synced and working smoothly!
Additional Features for Scanning on iPhone
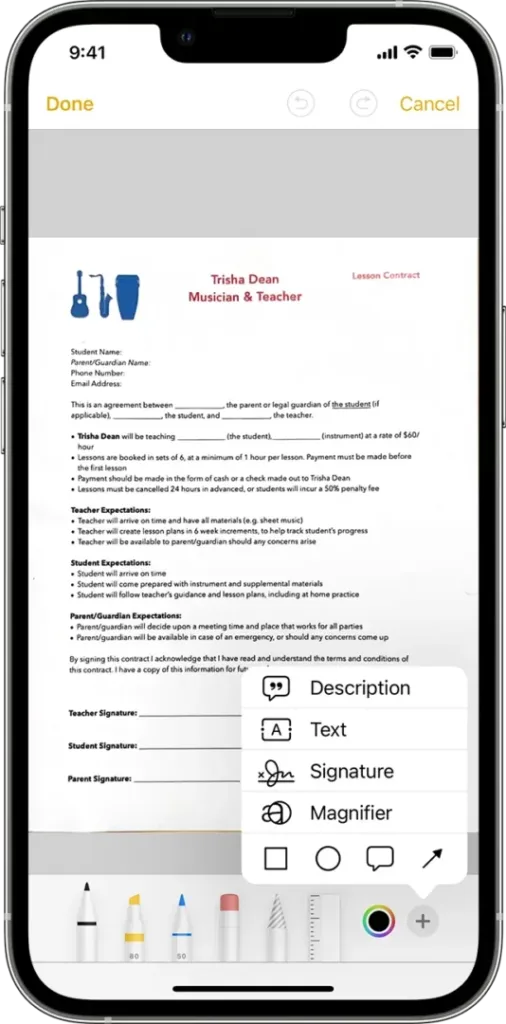
Signing Documents
If you need to sign a document after scanning, you can do this directly in the Notes app:
- Open the Scanned Document: Tap on the scanned document in your note.
- Tap the Markup Icon: This is usually represented by a pencil icon.
- Add Signature: You can create a new signature or use a saved one. Adjust the size and place it on the document.
Organizing Your Scans
To keep your scanned documents organized:
- Create Folders: Use folders in the Notes app to categorize your scanned documents.
- Use Tags: You can tag notes for easy searching later.
Sharing Your Scans
Once you have scanned and saved your documents, sharing them is simple:
- Tap the Share Icon: This is usually a box with an arrow pointing up.
- Choose Your Method: You can share via email, message, or save to cloud storage.
Tips for Better Scanning
- Lighting: Ensure good lighting to avoid shadows on your document.
- Flat Surface: Place documents on a flat surface to capture clear scans.
- Clean Lens: Wipe your iPhone camera lens for clearer images.
Final Words
Scanning documents on your iPhone using the Notes app is a quick and effective method to digitize important papers. With just a few simple steps, you can capture, edit, and share your documents easily. This feature not only saves time but also keeps your documents organized and accessible. Whether for personal use or business needs, knowing how to scan a document on your iPhone is a valuable skill.

")


