Creating a backup is one of the simplest yet most effective measures that can be taken to protect data and a system. A backup is the first copy of your files, settings and programs that can be used to start your computer again in the event of a virus attack, hardware failure or a common human blunder. A backup can also assist you in transferring information and platforms to another computer or another OS.
The different kinds of backups include file backup, whereby only your files are copied, and system backup, which copies the system right from the OS, the applications and the settings. And for this blog post, the steps and instructions covered will be based on how to perform a system backup to an external USB and how to perform a system restore in the Windows 7 operating system in the year 2024.
 QUICK ANSWER:
Connect an external USB drive to your PC and open the Control Panel. Go to System and Security > File History > System Image Backup > Create a system image. Select the external USB drive and the drives you want to back up and click Start Backup. Create a system repair disc or use Windows installation media. To restore your system, connect the external USB drive and boot from the disc or the media. Go to Repair your computer > Troubleshoot > Advanced options > See more recovery options > System Image Recovery. Select the system image on the external USB drive and click Finish to restore your system.
What is a System Backup and How to Use it to Protect Your Data
A system backup, also called a system image backup, is the duplicate of an operating system and data files at a given time. It comprises all contents found on your system drive, including the OS, the drivers, the registry, the boot files, and user profiles. A system backup will enable you to bring your computer back to the state of this backup if anything goes wrong in the process, such loss of data or settings.
To make a backup or a copy of your operating system, you will require an external hard drive, which is a USB drive with enough space to contain the system image. The size of the system image is generally determined by the capacity of your system disk and the volume of data it contains. One can check the size of your System drive through File Explorer, right-click on drive and look for the Properties option.
 1")
How to Create a System Backup to an External USB Drive
To create a system backup to an external USB drive, follow these steps:
Step #1: Plug the external storage device into your computer through the USB port and confirm that the operating system has detected the USB drive. Others can be checked by opening Windows File Explorer and looking at This PC to check for the drive letter.
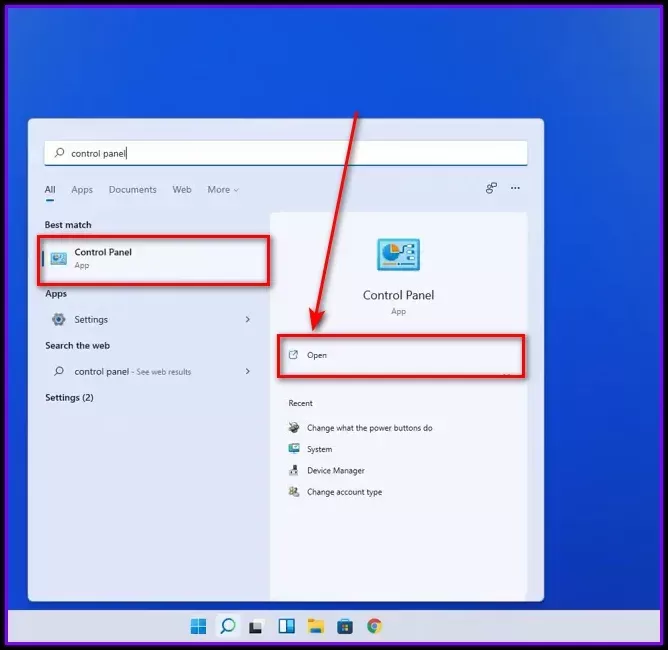
Step #2: Go to the start menu and type the words” control panel” in the shown search bar. If you’re using Windows 8, locally, move the cursor to the bottom right of the screen until the ‘Charms bar’ drops down, click on the ‘Control Panel’ app.
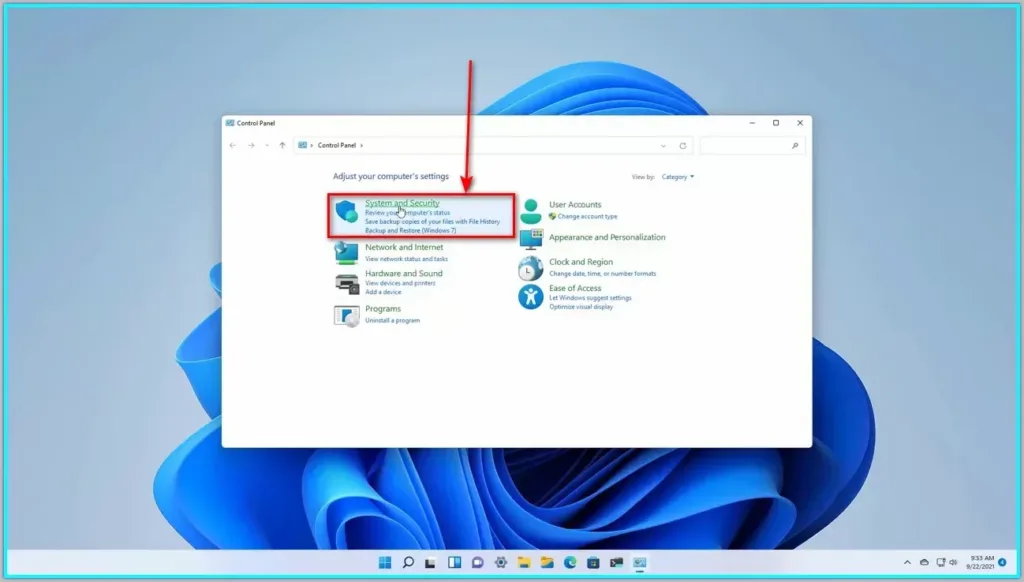
#3 In the Control Panel, click on the System and Security category.
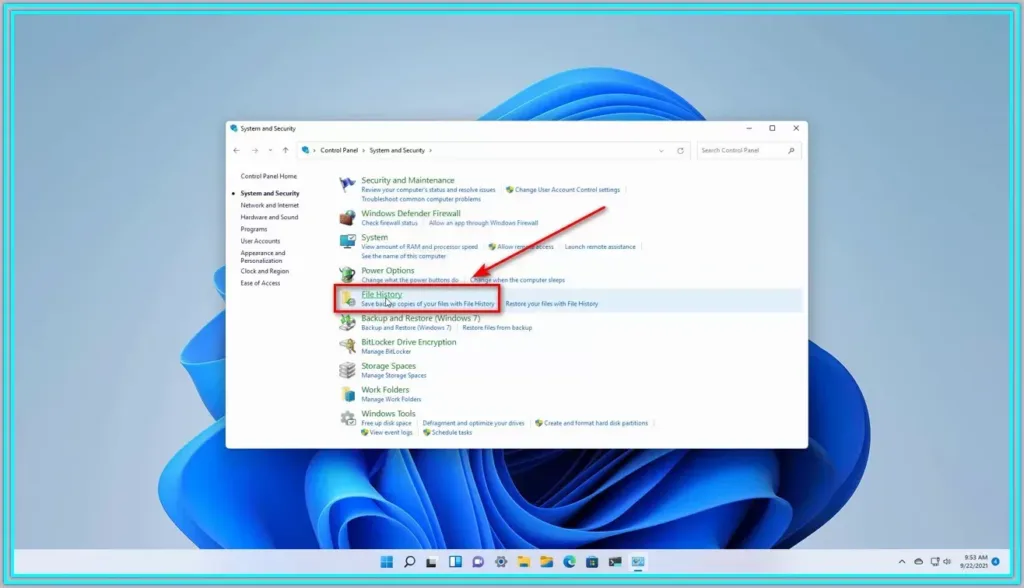
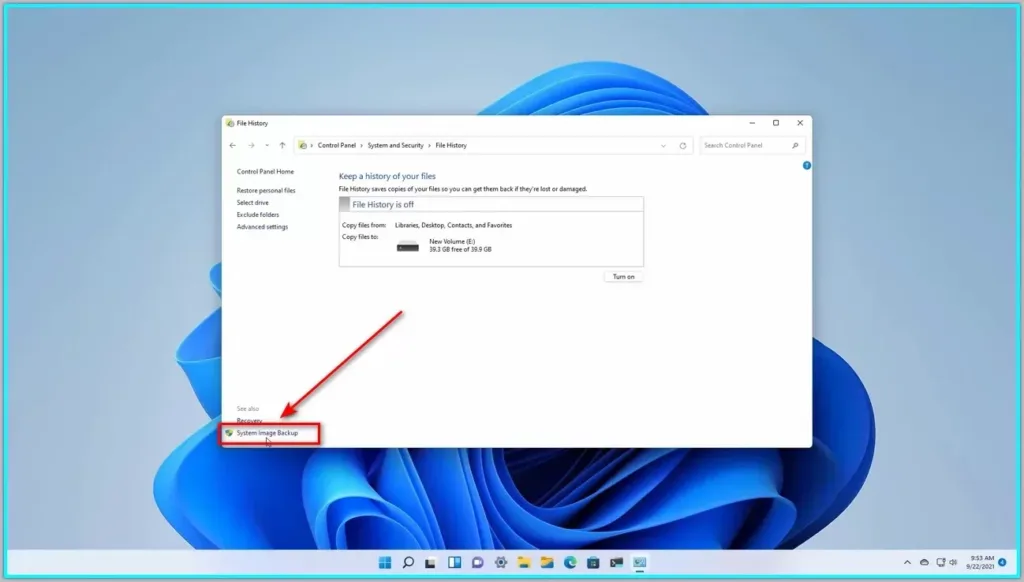
#4 In the System and Security window, click on the File History option.
#5 In the File History window, click on the System Image Backup option in the lower-left corner.
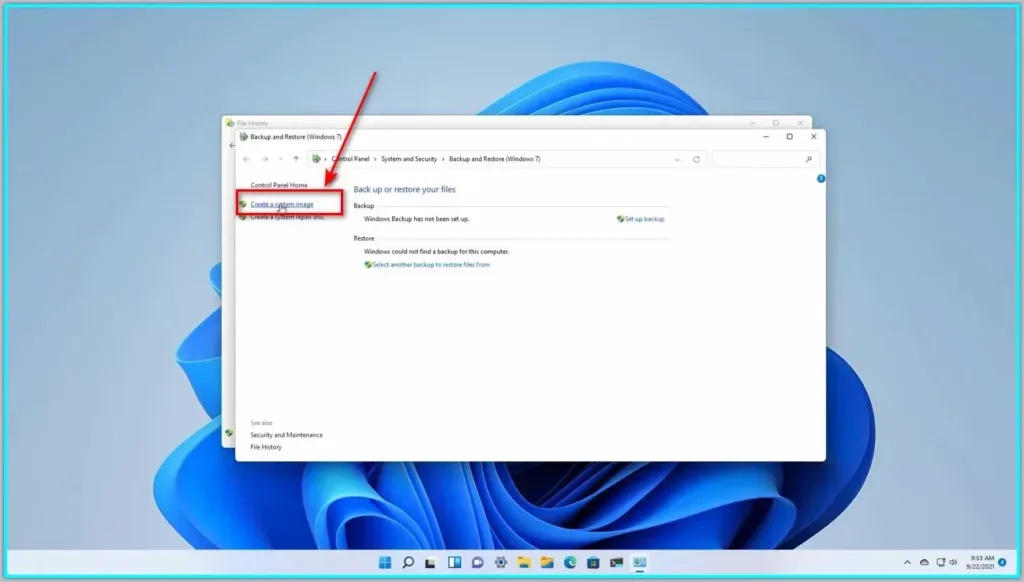
#6 In the System Image Backup window, click on the Create a System Image option in the left pane.
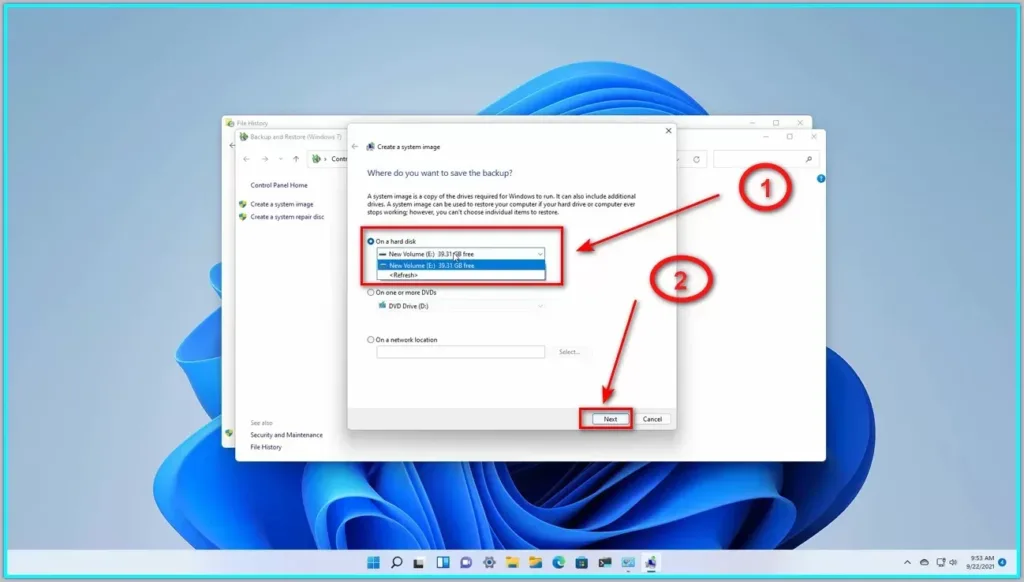
#7 In the Create a System image wizard, select the On a Hard Disk option and choose the external USB drive from the drop-down menu. Click Next to continue.
#8 In the next screen, you can select which drives you want to include in the backup. By default, Windows will select the system drive and any other drives that are required for Windows to run. If you have multiple hard drives, you can also select them here. Click Next to continue.
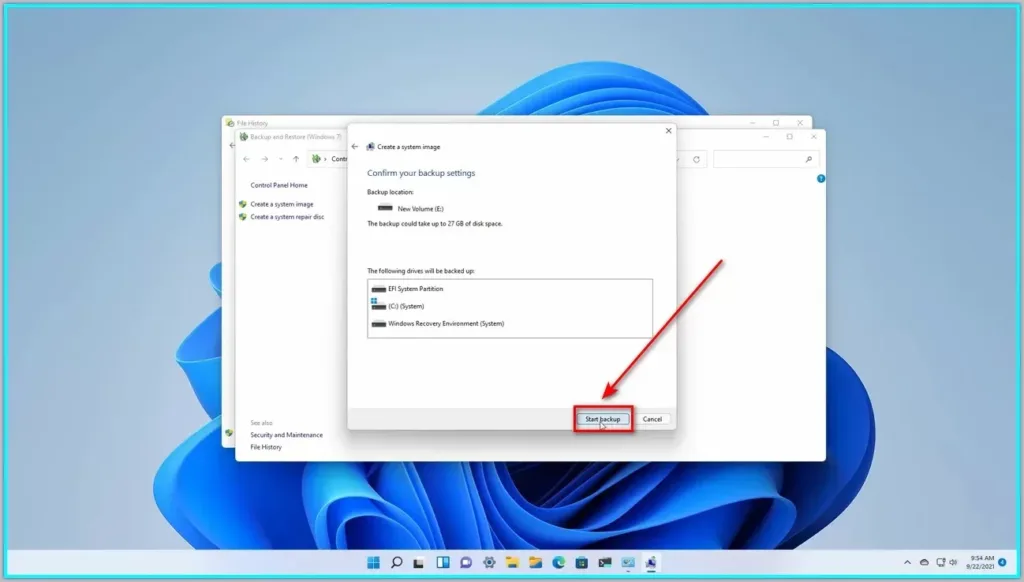
After that, you will be presented with the progress of creating the system image in Windows. Depending on how big the system image is and the transfer rate of an external USB drive you may have to wait some time. Ensure that you do not shut your system down or remove the external USB device before the creation of the backup is over.
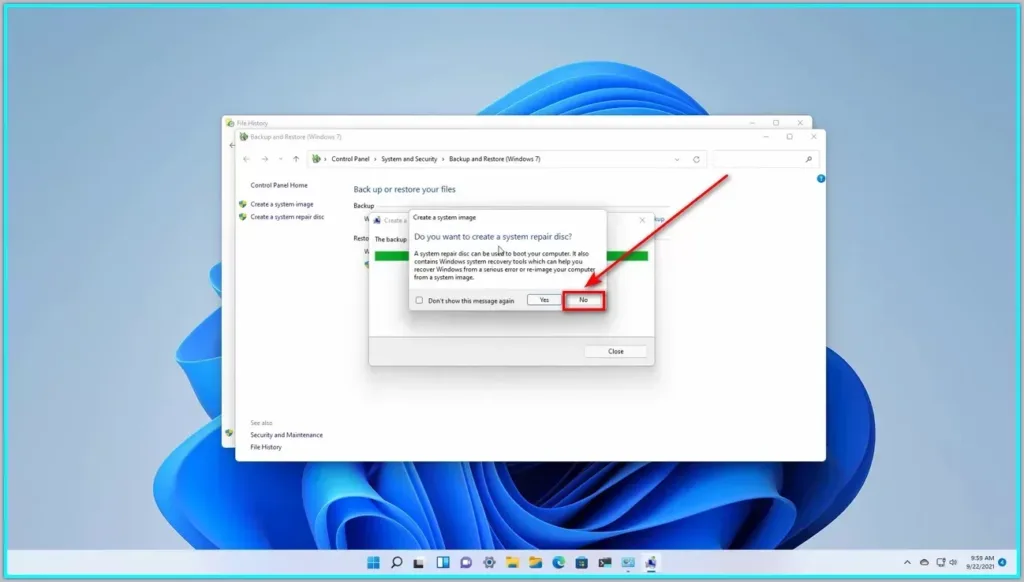
Once this is done, you receive the pop informing that you can now create a system repair disc. System repair disc is an operational disc used to start the recovery of system image in case one is unable to boot one’s computer. You are to insert a blank CD or DVD to create a system repair disc; however, you can also go without it using Windows installation media. Here, click Yes if you want System Recovery to make a system repair disc or No if you do not need the disc.
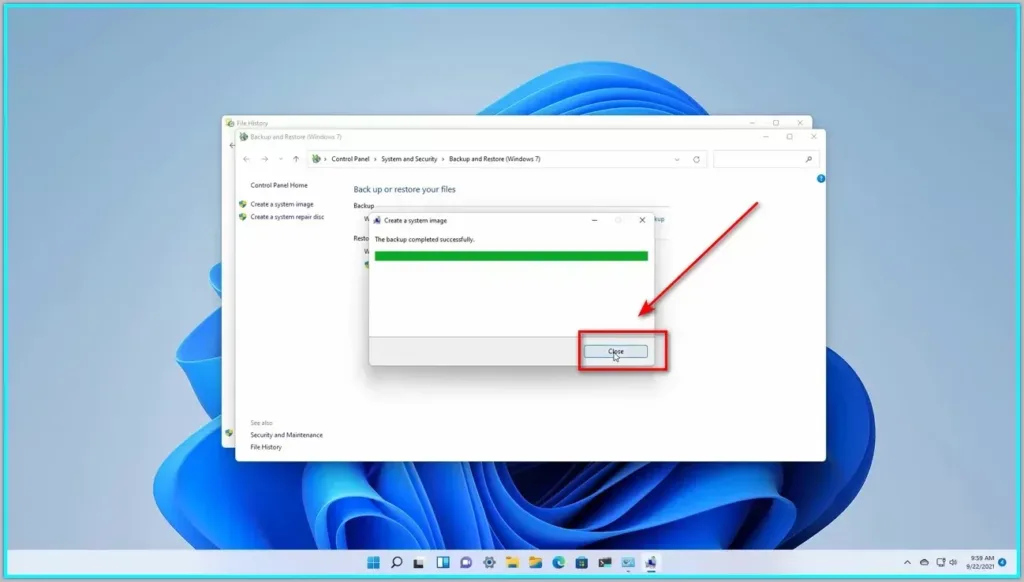
#10 You will see a message saying that the backup was completed successfully and showing you the location of the system image. Click Close to exit the wizard.
You have now created a full backup of your system to an external USB drive. You can safely disconnect the external USB drive and store it in a safe place. You can also create multiple system images and keep them on different external USB drives for extra security.
How to Restore Your Computer from a System Image Backup
To restore your computer from a system image backup, follow these steps:
#1 Connect the external USB drive that contains the system image to your computer and make sure Windows recognize itM.
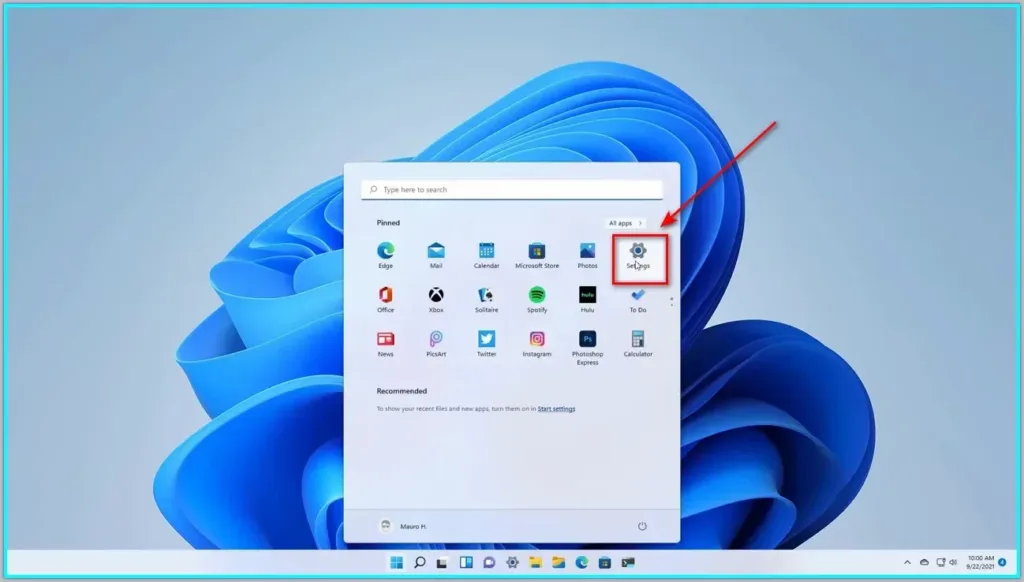
#2 Click on the Start button and then click on the Settings option. Alternatively, you can press the Windows key + I shortcut to open the Settings app.
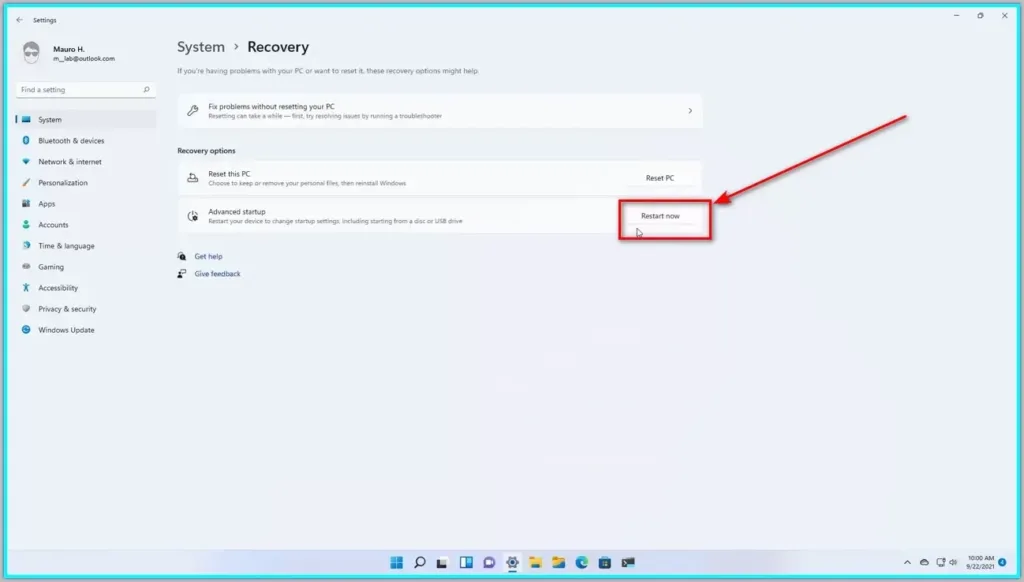
#3 In the Settings app, go to System and then click on the Recovery option in the left pane.

#4 Under the Advanced Startup section, click on the Restart Now button. This will restart your computer and take you to the Windows Recovery Environment.
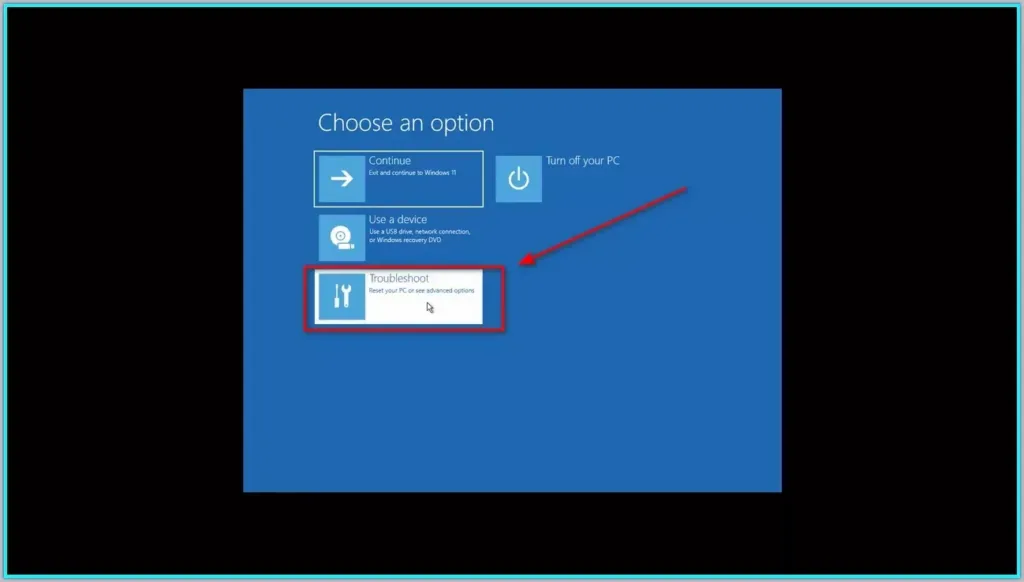
#5 On the Choose an option screen, click the Troubleshoot option.
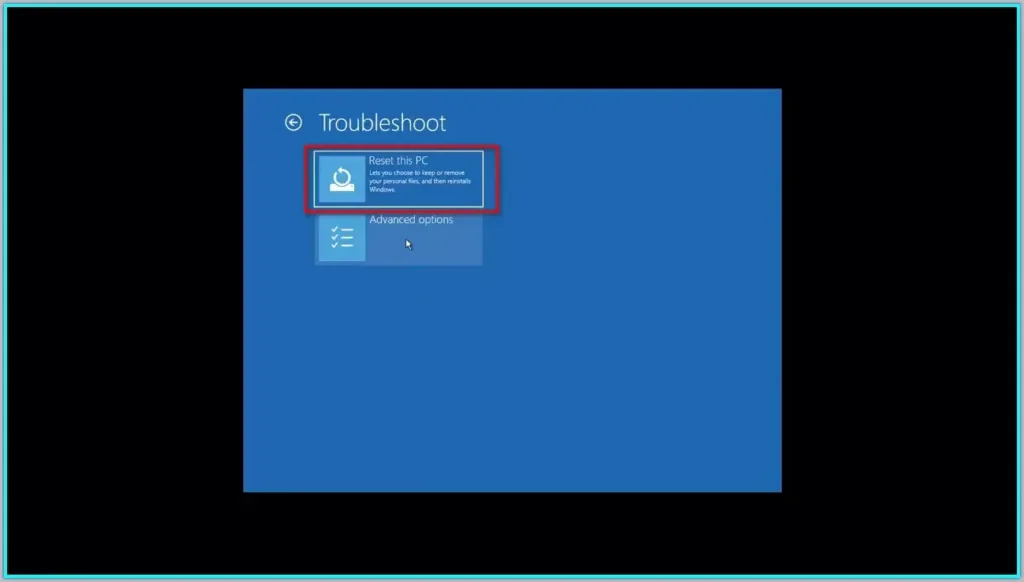
#6 In the Troubleshoot screen, click on the Advanced options option.
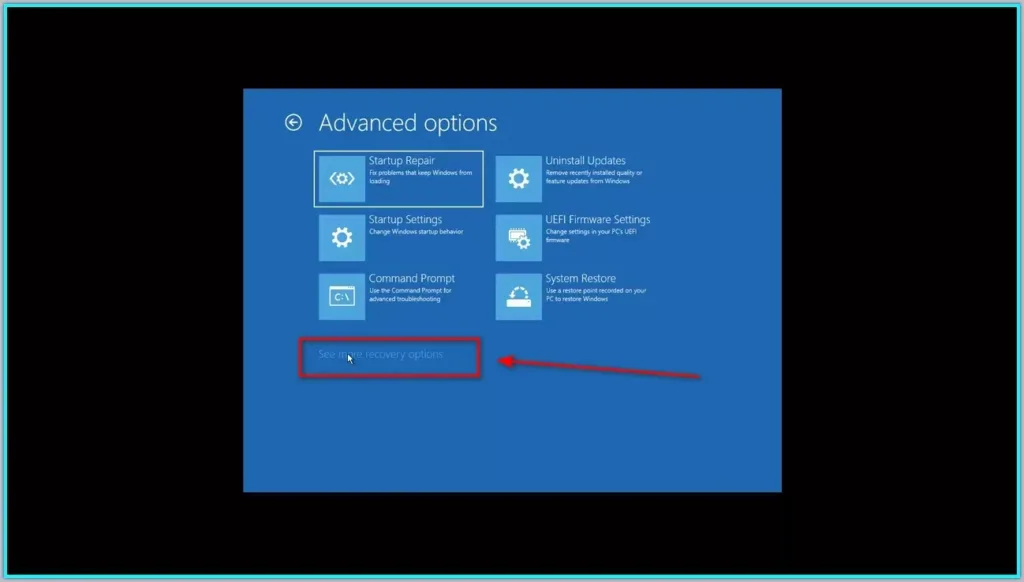
#7 In the Advanced options screen, click on the See more recovery options option.
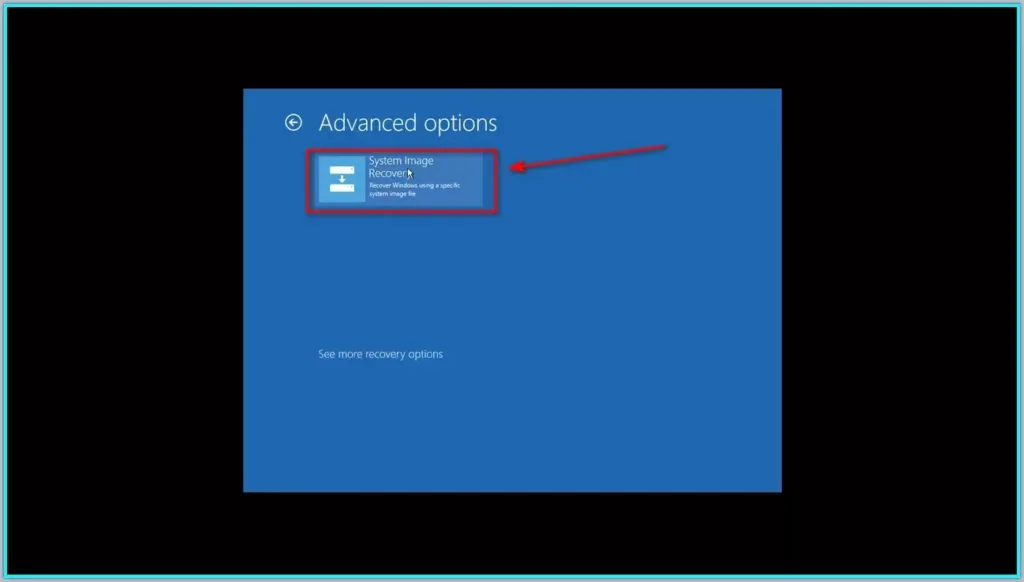
#8 Click on the System Image Recovery option in the See More recovery options screen.
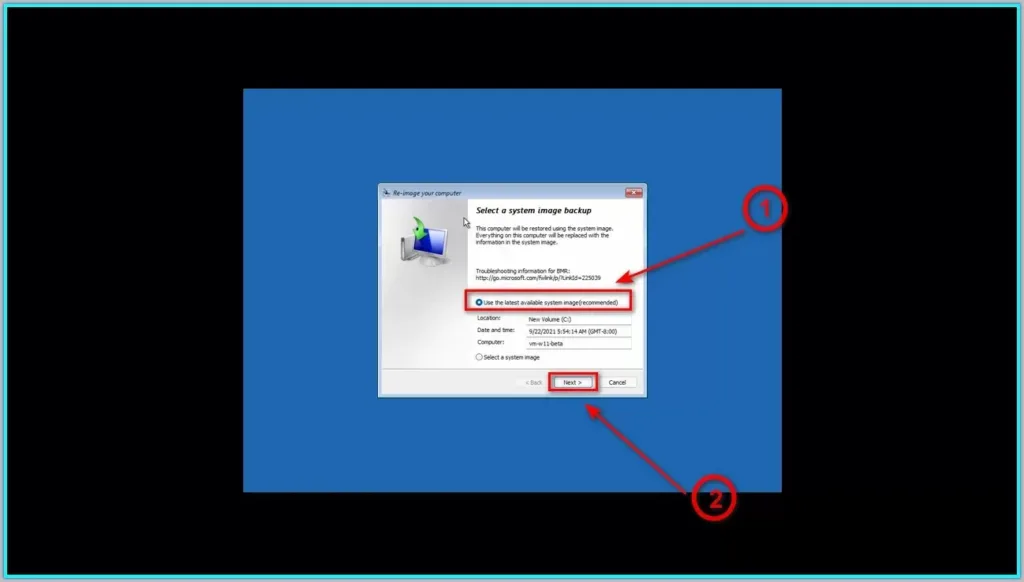
#9 On the System Image Recovery window, select Use the latest available system image and click on the Next button. This will automatically look for the system image on the connected USB and use it to recognize your computer. If you use several system images, you can also choose the Select a system image option, with the help of which you can specify the necessary system image.
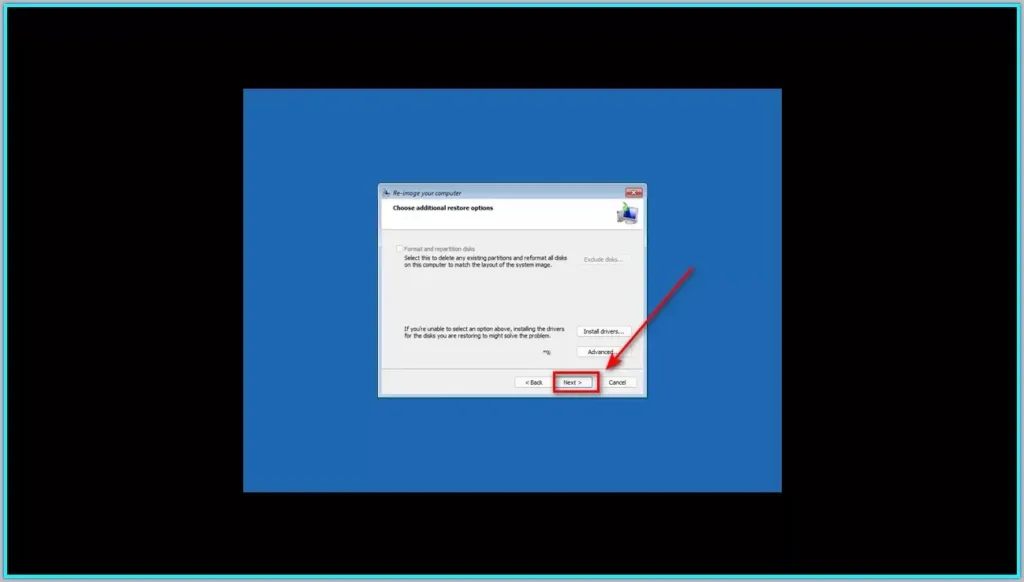
#10 In the next screen, you can exclude any drives that you do not want to format and restore. By default, Windows will restore all the drives that are included in the system image. Click Next to continue.
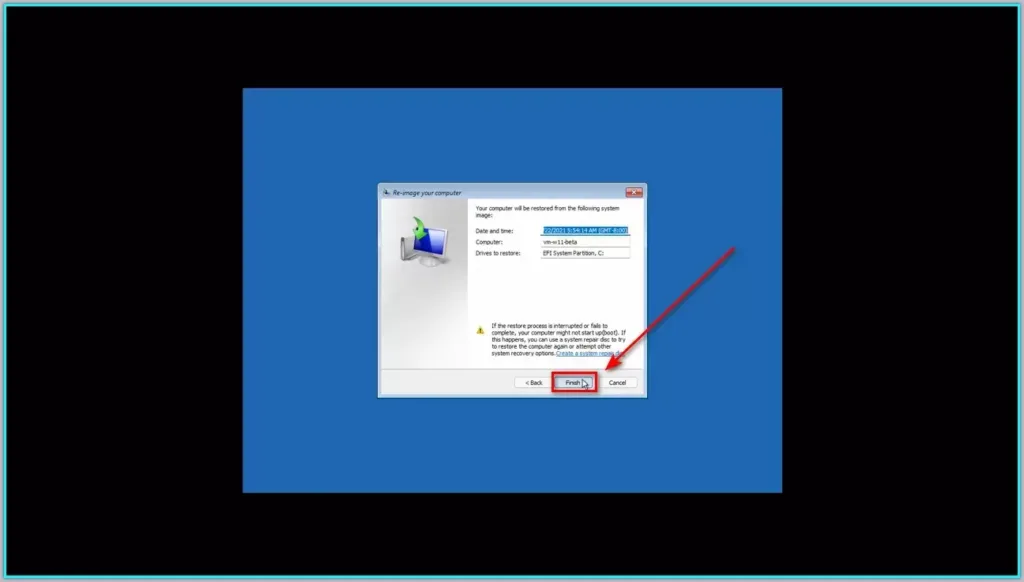
#11 In the next screen, you can review the re-image settings and see the warning message. Click Finish to confirm the restore process.
This will begin the restoration of your Windows computer from the system image and displaying the percentage. This may take some time, depending on the size of your system image and the speed of the external USB drive. One should not shut down the computer or remove the external USB drive before the restore procedure is over.
#13 On the completion of the restore, you will receive a message that the re-image is successful. If you want to strictly follow all the guidelines, click Restart to restart your Windows.
You have now successfully restored a system image on your computer.
Conclusion:
Taking a full backup and restoring that backup to an external USB drive is quite easy and safeguard your data and system against any mishap. To create and restore a system image backup in Windows, you can use the following alternatives: Windows tools or third-party software. It is recommended to carry out the system image backup occasionally and store it on a safe USB external drive. Additionally, it is wise that you conduct some backup and restore tests in order to determine the validity of the process you intend to use. For this reason, it is important to back up your computer, and this guide is going to show you how you can do that in order to be restored in the year 2024.

")


: Key Differences and Use Cases")


