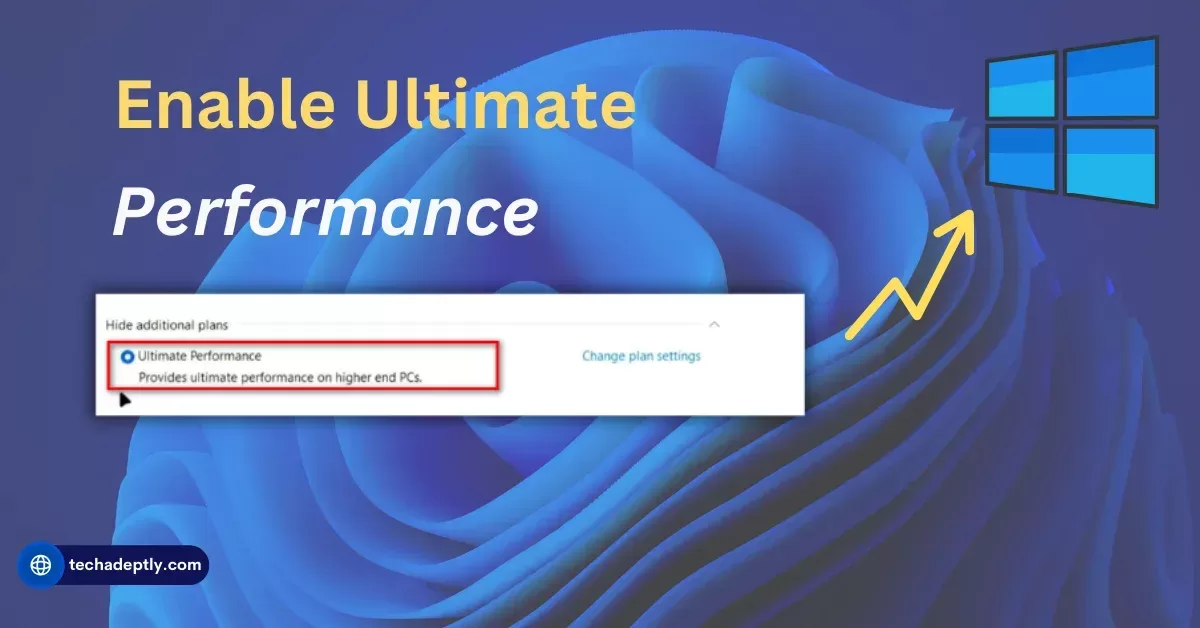
If you wish to maximize the performance of your Windows PC to the greatest extent possible – here’s how you can go about it. If you crave for the best gaming,video leading or 3D rendering performance, then you should read this article. If you desire to make your Internet access are blazing fast, have the fastest boot time, and have the capability of running flash games at lightning speed, then it may well be possible to give your PC a speed boost.
If you are among these, that is, if you have answered a yes to any of the following questions, then you should enable the Windows Ultimate Performance mode. It is a plan for the hidden power that can help in increasing the performance of the PC by increasing the settings on the system as well as the hardware. It can optimize your PC for maximum performance whether you’re hailing away at the keys or the battery is almost out.
But as Windows ultimate is not available out of the box in Windows 11 or Windows 10, the performance mode like new in Windows 10 is not available even in new build of Windows 10. Unfortunately, it does not start automatically, and you need to enable it with a single command. In this blog, I will explain to you on how to turn on Windows ultimate performance mode in Windows 11/10 in few simple steps.
Are you ready for maximum increase of your PC’s performance?Then let’s get started!
Open Control Panel and change View by to Small icons. Click on Power Options and open a terminal window with administrator privileges. Copy and paste the command (you can find it in the blog post). Hit Enter and go back to Power Options. Click on Show Additional Plans and select Ultimate Performance mode.
How to Set Ultimate Performance Mode in Windows 11/10
By default, you will not see Windows ultimate performance mode in the list of power plans in Windows 11 or Windows 10. You need to enable it manually using a simple command. Here are the steps to do that:
Step 1: Open Control Panel
The first step is to open the Control Panel app on your PC. You can do this by searching for “control panel” in the Start menu or the taskbar search box. Alternatively, you can press the Windows key + R to open the Run dialog box, type “control” and hit Enter.
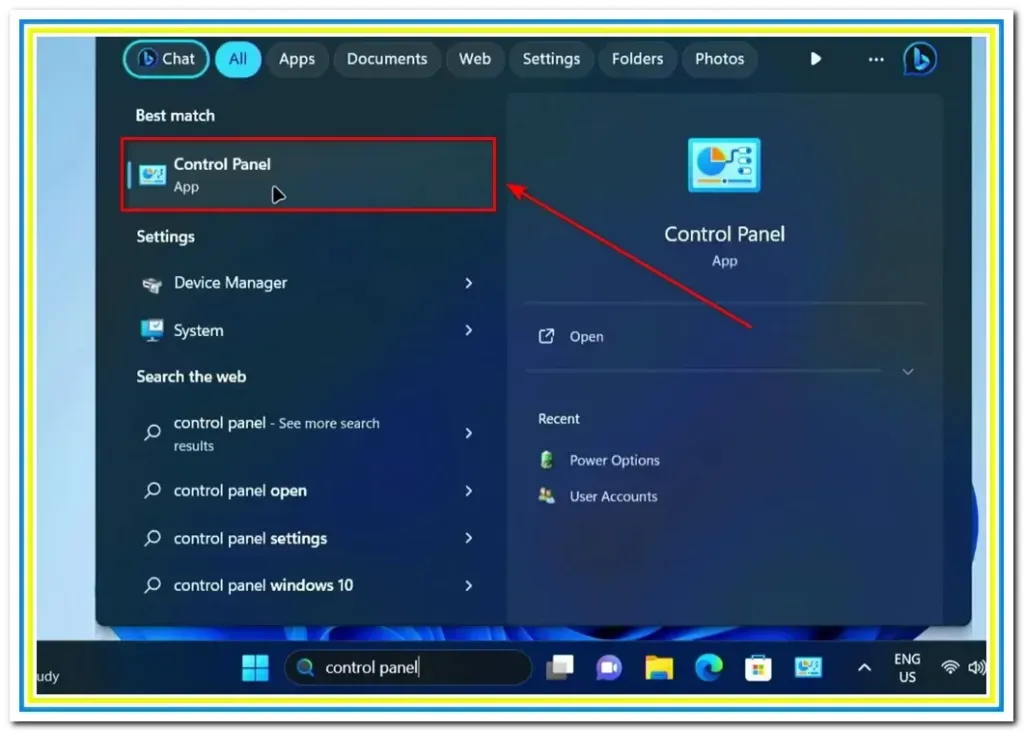
Step 2: Change View to Small Icons
Once you open the Control Panel app, you will see different categories of settings. To make it easier to find the power options, you need to change the View by option to Small icons. You can do this by clicking on the drop-down menu in the top right corner of the Control Panel window and selecting Small icons.
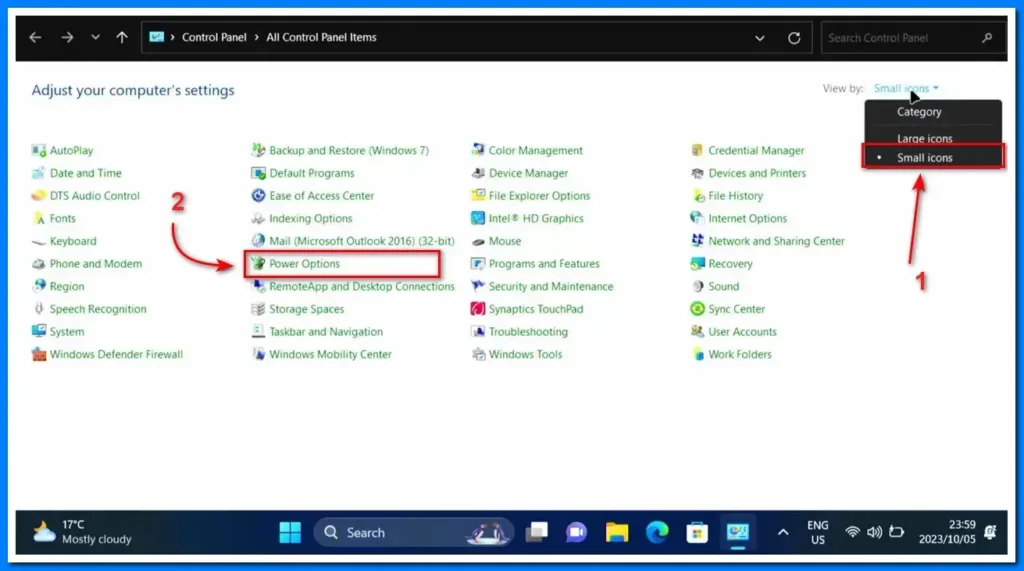
Step 3: Click on Power Options
After changing the View by option to Small icons, you will see a list of all the settings available in the Control Panel. Find the Power Options setting and click on it. This will open a new window where you can see and change the power plans for your PC.
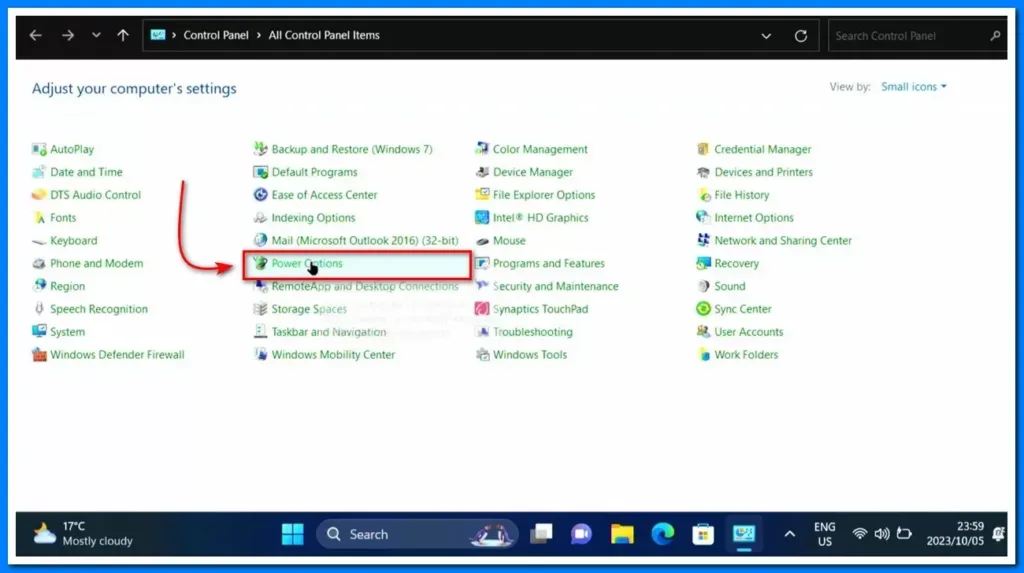
Step 4: Enable Ultimate Performance Mode Using a Command
By default, you will only see the Balanced power plan in the Power Options window. This is the recommended power plan for most users, as it balances the performance and energy consumption of your PC.
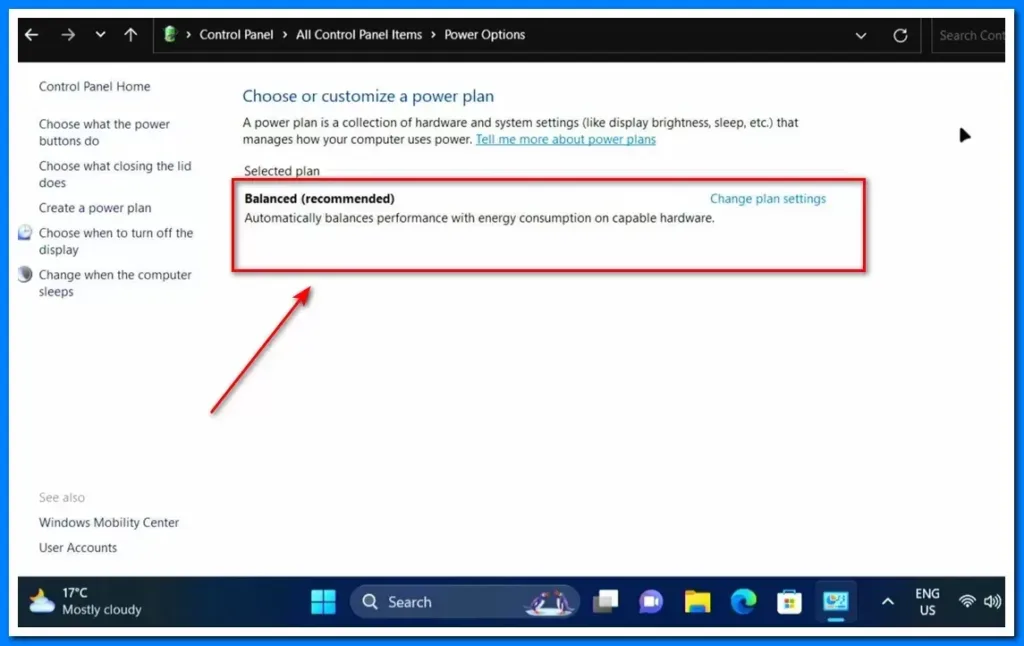
However, if you want to enable the ultimate performance mode, you need to add it to the list of power plans using a command.
To do this, you need to open a terminal window with administrator privileges. You can do this by right-clicking on the Start button and searching for either Command Prompt (Admin), PowerShell (Admin), or Terminal (Admin). Choose any of these options and click on Yes if prompted by the User Account Control.
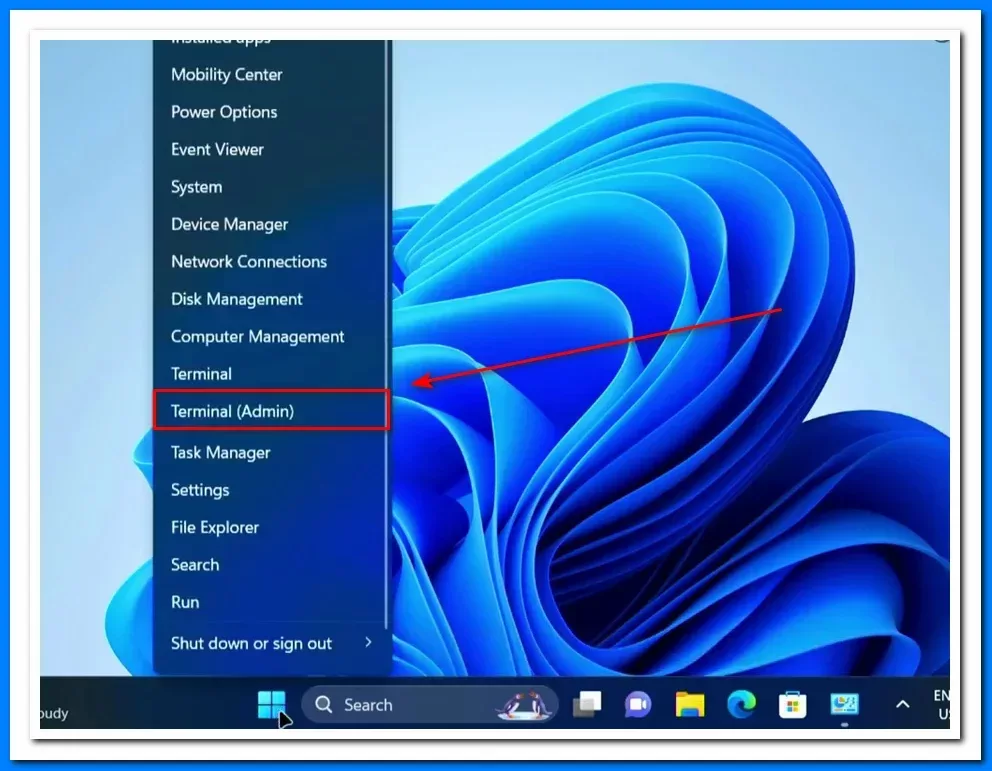
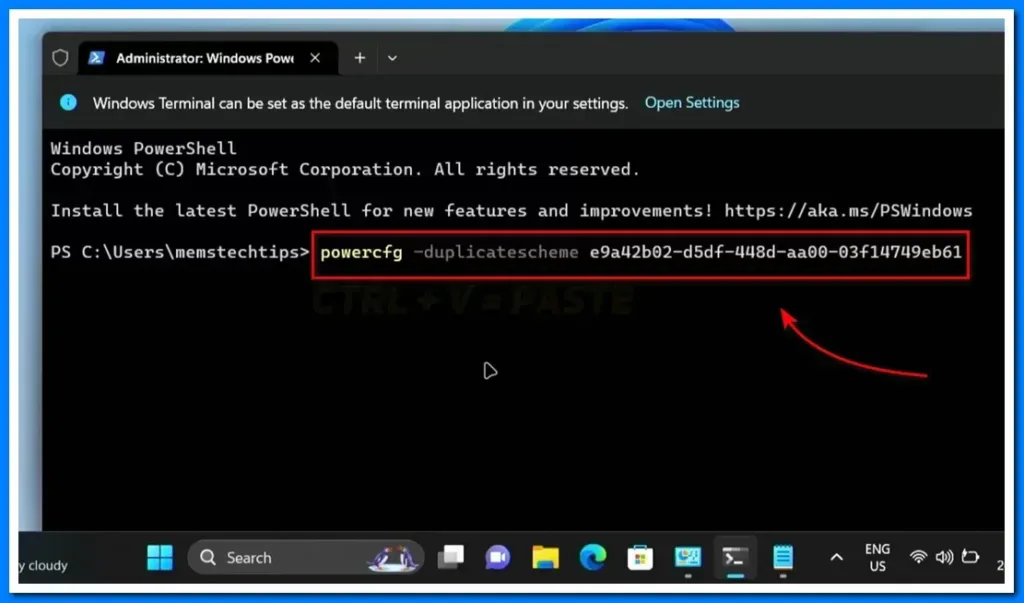
Once you open the terminal window, you need to copy and paste the following command:
powercfg -duplicatescheme e9a42b02-d5df-448d-aa00-03f14749eb61
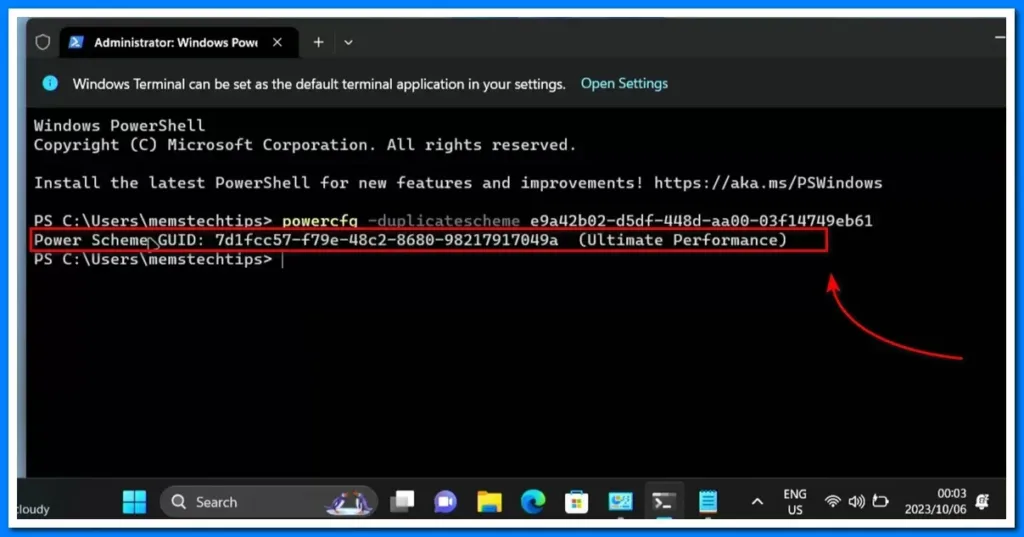
Step 5: Select Ultimate Performance Mode in Power Options
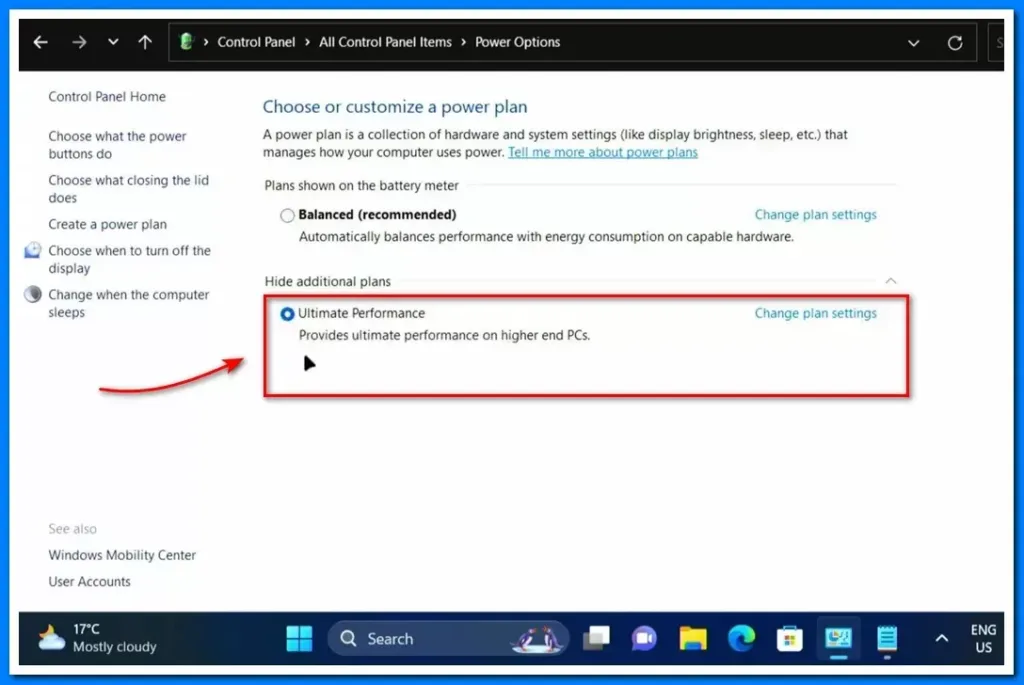
Now that you have enabled the ultimate performance mode using the command, you need to select it as your active power plan. To do this, go back to the Power Options window in the Control Panel. You should see a new option called Show Additional Plans. Click on it and you will see the Ultimate Performance mode power plan.
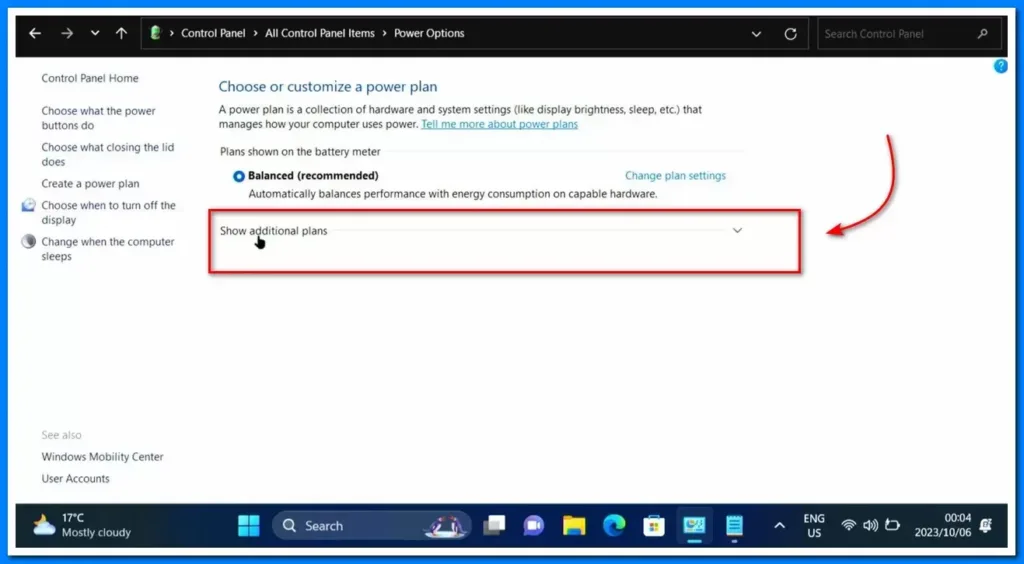
Click on the radio button next to the Ultimate Performance mode power plan and you will see a message saying that your power plan has been changed. Congratulations, you have successfully enabled the ultimate performance mode in Windows 11/10!
What is Windows Ultimate Performance Mode?
Windows ultimate performance mode is a power plan that provides the highest level of performance and responsiveness for your PC. It does this by adjusting the system settings and hardware configuration to eliminate micro-latencies and reduce power throttling. This means that your PC will always run at its full potential, regardless of the workload or battery status.
Windows ultimate performance mode is designed for scenarios where every ounce of performance matters, such as gaming, video editing, or 3D rendering. It can also help you avoid lag, stuttering, or freezing issues that may occur with other power plans.
However, Windows’s ultimate performance mode also comes with some drawbacks. It consumes more power and generates more heat than other power plans, which can affect your PC’s battery life and durability. It may also cause some compatibility issues with certain devices or applications that rely on power management features. Therefore, you should only use Windows Ultimate performance mode when you need it, and switch back to a more balanced power plan when you are done.
Wrapping Up
You have just learned how to enable Windows Ultimate performance mode in Windows 11/10. This is a hidden power plan that can boost your PC’s performance by optimizing the system settings and hardware configuration. It can make your PC run faster, smoother, and more responsive than ever before.
However, Window’s ultimate performance mode also has some drawbacks. It consumes more power and generates more heat than other power plans, which can affect your PC’s battery life and durability. It may also cause some compatibility issues with certain devices or applications that rely on power management features. Therefore, you should only use Windows Ultimate Performance mode when you really need it and switch back to a more balanced power plan when you are done.
How is the ultimate performance mode different from the high-performance mode?
Ultimate performance mode is more extreme than high-performance mode. It eliminates micro-latencies and reduces power throttling to provide the highest level of performance and responsiveness for your PC.
How can I check or disable the ultimate performance mode on my PC?
You can check or disable ultimate performance mode on your PC by going to the Power Options window in the Control Panel. You should see the Ultimate Performance mode power plan selected as your active power plan. To disable it, you can select a different power plan or delete the ultimate performance mode power scheme using the command:
powercfg -delete e9a42b02-d5df-448d-aa00-03f14749eb61
What are the pros and cons of ultimate performance mode?
The pros of the ultimate performance mode are that it can boost your PC’s performance by optimizing the system settings and hardware configuration. It can make your PC run faster, smoother, and more responsive than ever before.
The cons of the ultimate performance mode are that it consumes more power and generates more heat than other power plans, which can affect your PC’s battery life and durability. It may also cause some compatibility issues with certain devices or applications that rely on power management features. Therefore, you should use it wisely and switch back to a balanced power plan when you don’t need the extra speed.

