Do you want to record your Android screen to make a tutorial, showcase mobile gameplay, or document a software bug? You can do it easily without needing any extra apps. Your Android device already has a built-in screen recorder.
This blog post explains how to use your Android’s native screen recording feature. I’ll walk you through how to access it, record your on-screen actions, find the recordings, and close it out when finished.
Whether you want to narrate a how-to video, capture an epic gaming moment, or report issues to a developer, your phone has all you need. Let’s unlock that hidden gem without apps or unnecessary permissions. Read on to become a pro screen recorder!
 QUICK ANSWER:
To screen record on your Android, open Quick Settings and tap the Screen Recorder toggle. Tap the red circle button to start recording, then tap again to stop and automatically save. Access the video in your Photos app.
Step-by-Step Guide to Recording Your Screen on Android Without Any App Downloads:
In this concise guide, we’ll walk you through the process of screen recording on your Android device without the need for any additional app downloads. Get ready to dive into the step-by-step instructions to unleash the full potential of your Android device’s built-in screen recording feature.
Let’s get started without further delay!
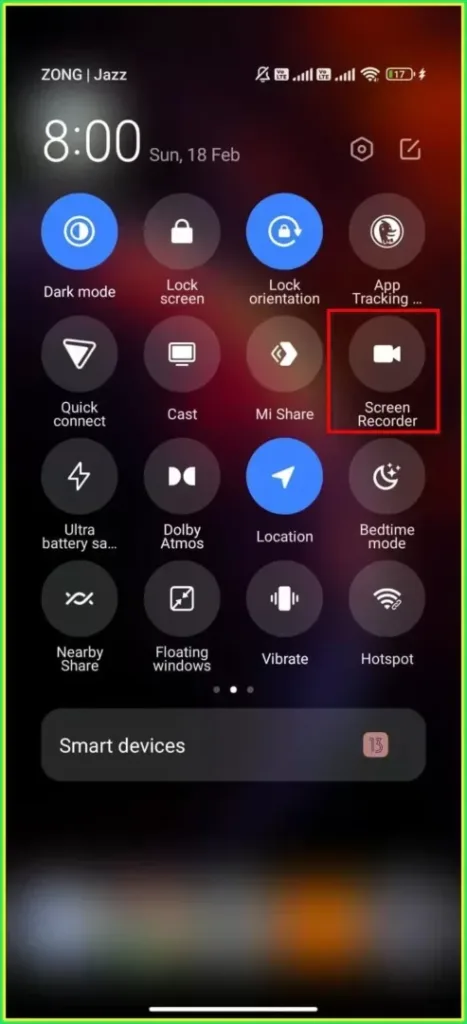
Access the Quick Settings Menu
The first step is to open your notification shade and tap the downward arrow to expand Quick Settings. Make sure the full menu is visible.

Locate the Screen Recorder Button
Scroll through the Quick Settings buttons until you find an icon that resembles an old video camera. This is your Screen Recorder toggle.
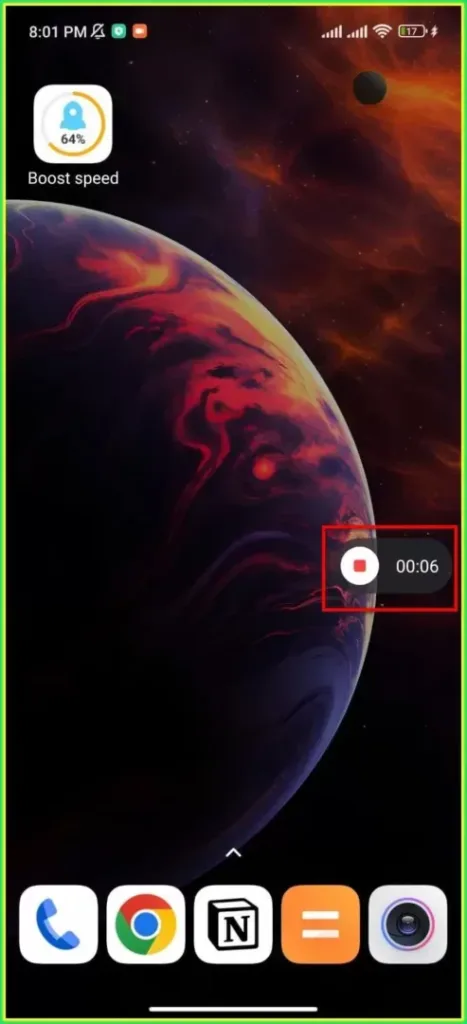
Tap the Red Circle to Record
Once enabled, you’ll see a floating control panel overlay with a large red circle icon – this is your Record button. Tap it to start a 3-second countdown, then it will actively capture footage.

As you can see, the screen recording has just begun.
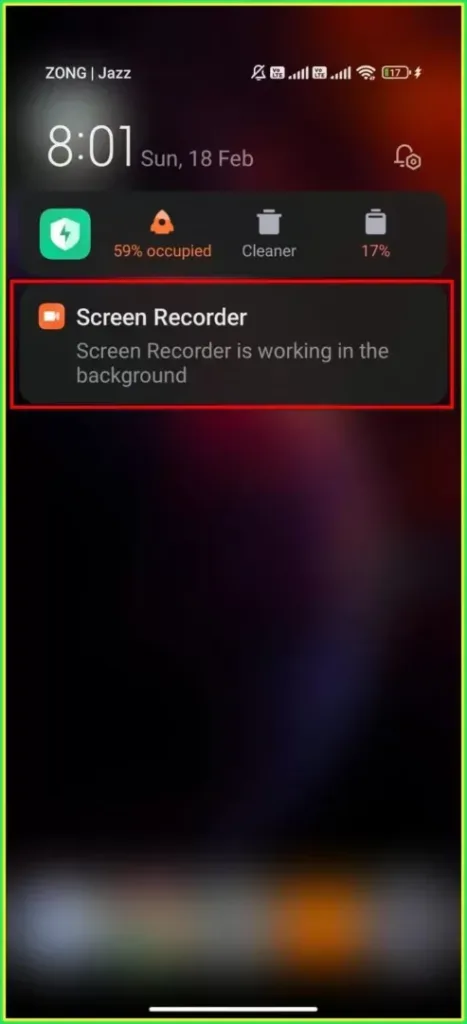
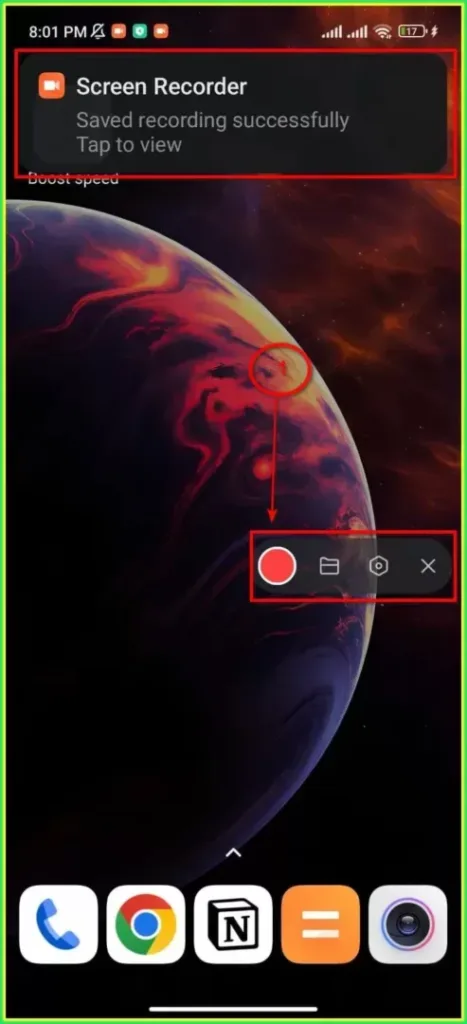
You can also see a notification message with the following message:
Tap Again to Finish Recording
When ready to stop, tap the red circle Record button again. This will end the video session and you’ll get a saved notification.
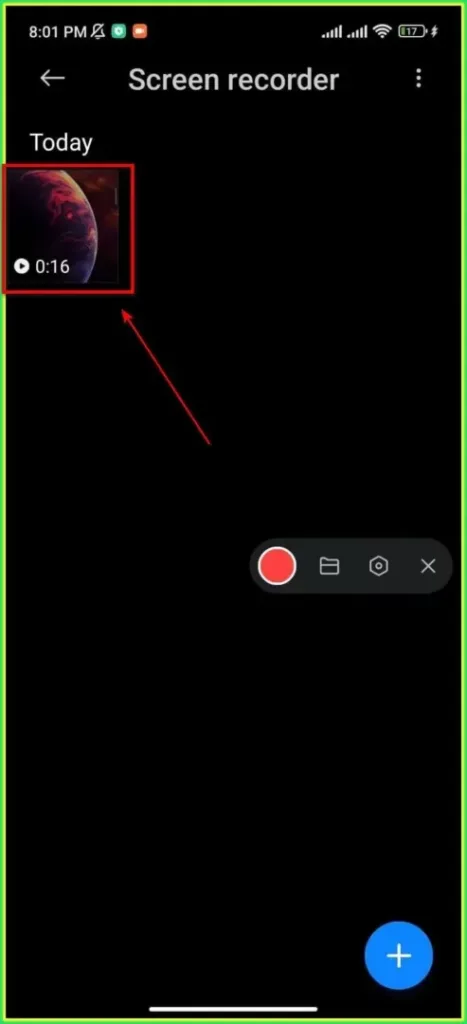
Review the Auto-Saved Video
Tap the folder icon in the overlay to open your video within Photos. By default, screen recordings are saved to the “Screen Recorder” album.
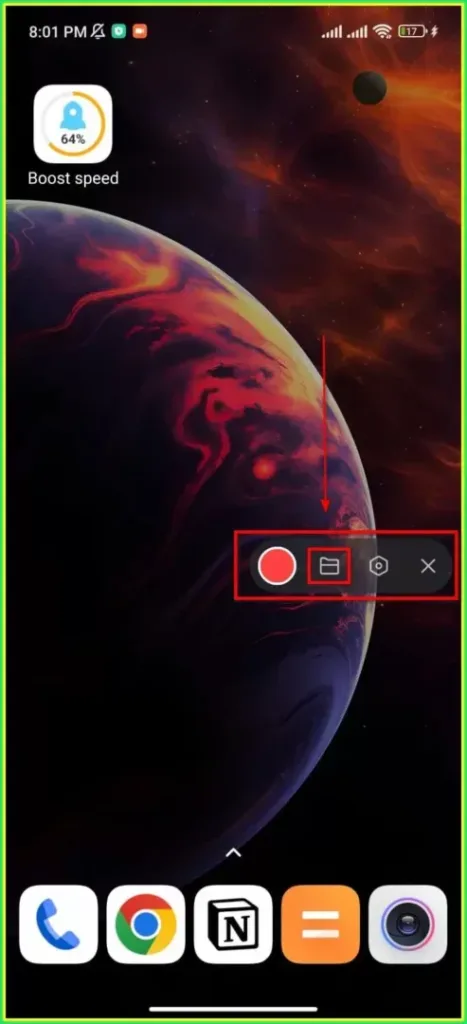
alternatively, you may see your recording right away by going to the gallery and selecting the “screen recorder” folder.
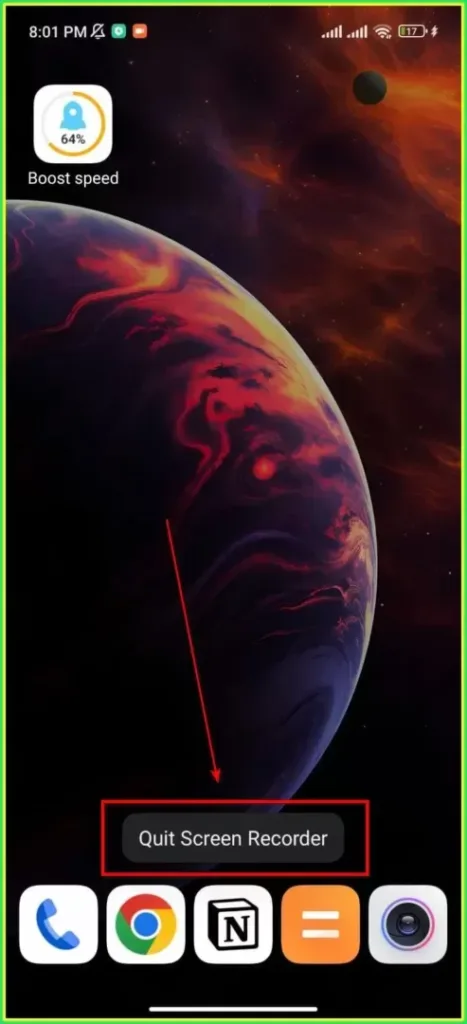
Close Out the Recorder Panel
When finished, tap the X icon to disable the recorder overlay until next enabled via Quick Settings. You can also just retract your notification shade.

Following your click on this icon, the following message will appear:

Are there any screen-recording apps for Android?
Although not required, there are still dedicated screen recorder apps available on the Play Store that provide more in-depth configuration options and resolutions up to 4K – but they generally come with price and interface complications.
Some free ones to try:
However, the default Android screen recorder experience should offer everything you need without draining storage space or substantial phone resources for most general use cases that don’t require live streaming or high resolutions.
Conclusion: Built-in Functionality Is So Convenient
And that’s all there is to recording your Android screen without requiring any extra apps or permissions! With the techniques above, you can leverage your device’s integrated functionality to capture high-quality footage for tutorials, gaming highlights, bug documentation, and more.
Just don’t forget to close it out fully when finished recording rather than just minimizing to the tray. Accidental recordings can quickly eat up storage space!
Frequently Asked Questions
What resolution/quality does the recording capture?
The default resolution captured by Android’s integrated screen recorder varies a bit by device but tends to record smoothly at 720p or 1080p HD at 30 frames per second. The quality is surprisingly solid!
Can I record internal sounds and mic audio too?
Yes! The screen recorder automatically captures all system sounds and audio playing on your device like music or video, along with microphone input if you narrate during recording.
Will screen recording drain my battery faster?
Screen recording uses more device resources so it is more battery intensive. But today’s phones generally have ample juice to record at least 30 minutes on a single charge. Close background apps first.
Where do the recordings get saved?
Recordings get automatically saved to internal storage in the Photos/Gallery app. An album called “Screen Recorder” is created to access all your clips. Back them up!
Can I edit the recordings after?
Absolutely! The captured MP4 files can be edited like any standard Android video. Trim footage, splice clips, export or upload to platforms like YouTube or social media right from Photos.
Do I need the internet to screen record?
Nope! As Android’s recorder utilizes native system tools only, it does not require an internet connection or account logins to capture footage of your on-screen activity.


One thought on “How to Screen Record on Android Without Any App Needed”